
Note: This post contains affiliated links . As an Amazon Associate I earn from qualifying purchases at no additional cost to you. I promise to only link products I personally use and recommend.
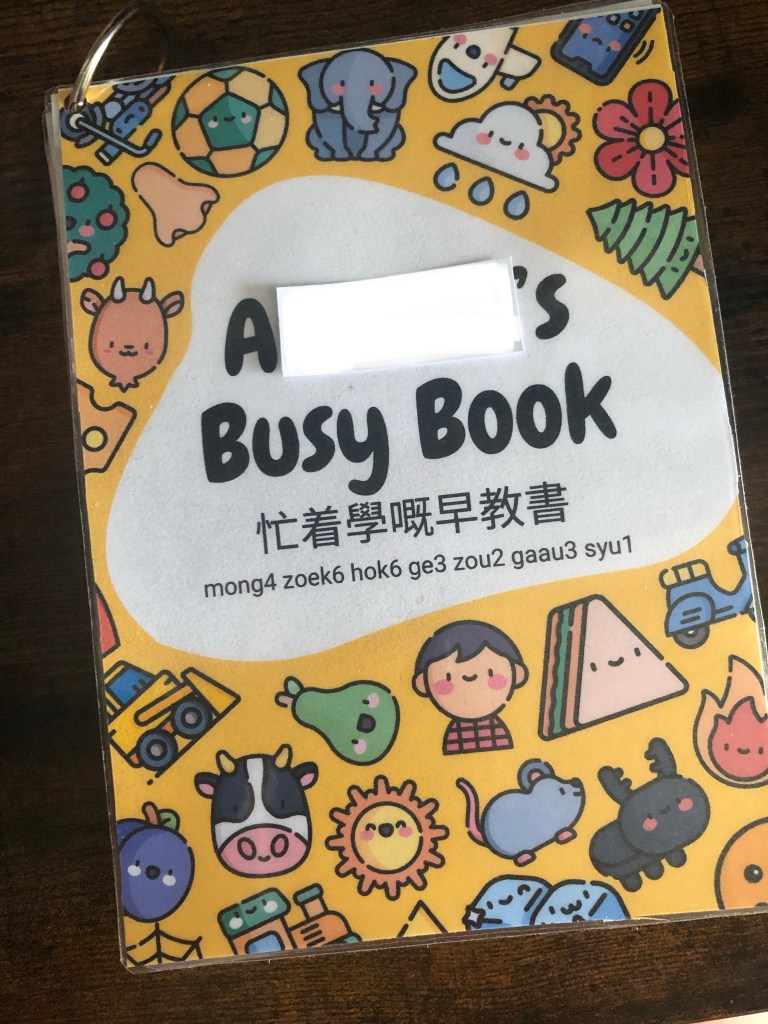
I am so excited to finally showcase what I’ve been working on these last few weeks behind the scenes- my Cantonese/Jyutping busy book! I’ve been planning on making a busy book for AJ for a while and then inspiration struck, why don’t I make one in Cantonese? From what I can see, there are hardly any busy books available in Standard Written Chinese, never mind in written Cantonese, and I think that’s a real shame.
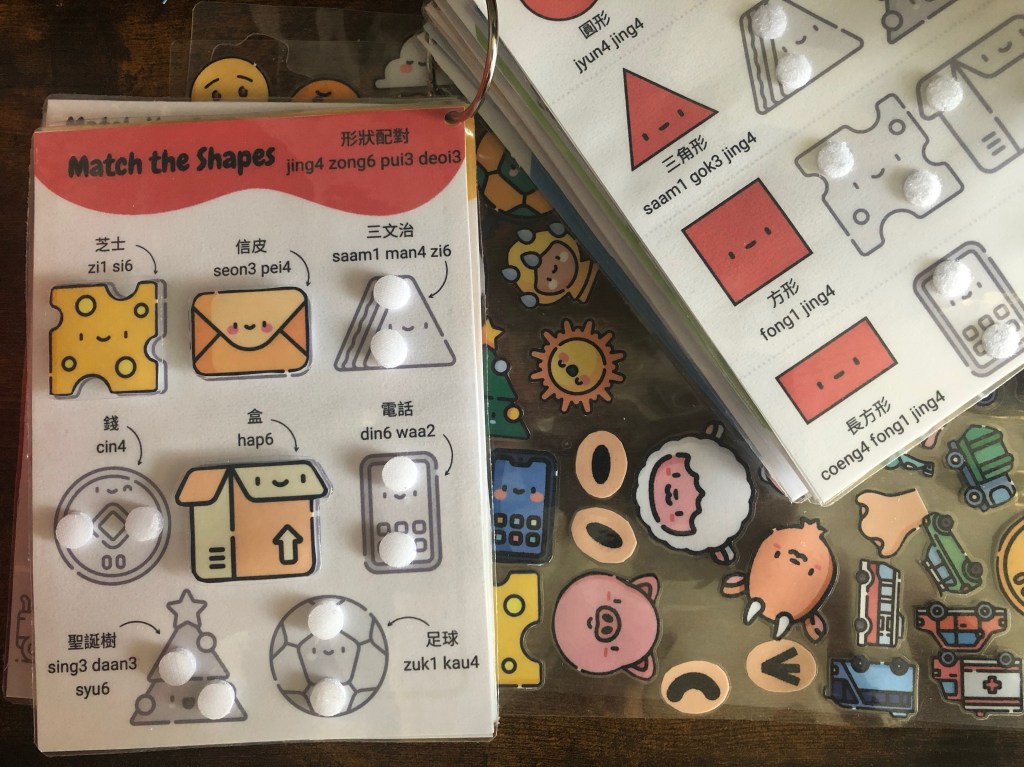
These pieces are the smallest in the book so I recommend leaving a big laminated trim when cutting them out- this won’t affect the looks of the page but still make it easier and safer for your little one to use.
What is a Busy Book?
A busy book is an interactive book featuring colourful pages and removable pieces, designed to stimulate your toddlers’ mind and keep their hands… well, busy! Activities include picture matching, colour sorting, pairing opposites, and categorising words. There are many benefits to busy books, including improved:
- fine motor skills
- hand-eye coordination
- pattern, shape and number recognistion
- visual discrimination
- strength for grasping motions
- problem solving and reasoning skills
They gain all these benefits while being exposed to the concept of pretend/imaginative play, educational topics, and lots of Cantonese vocabulary!
My Cantonese Busy Book
I made my busy book out of laminated pages and pieces, hole-punched and bound together with metal rings. The pieces are attached using Velcro dots, which means each activity can be done time and time again. Velcro dots also means your preschooler does not have to be precise with their placement so they can still interact with the book while they work on the hand-eye coordination.
My book will let your toddler explore the following topics:
- Animals
- Colours
- Shapes
- Numbers
- Opposites
- Emotions
- Faces
- Seasons
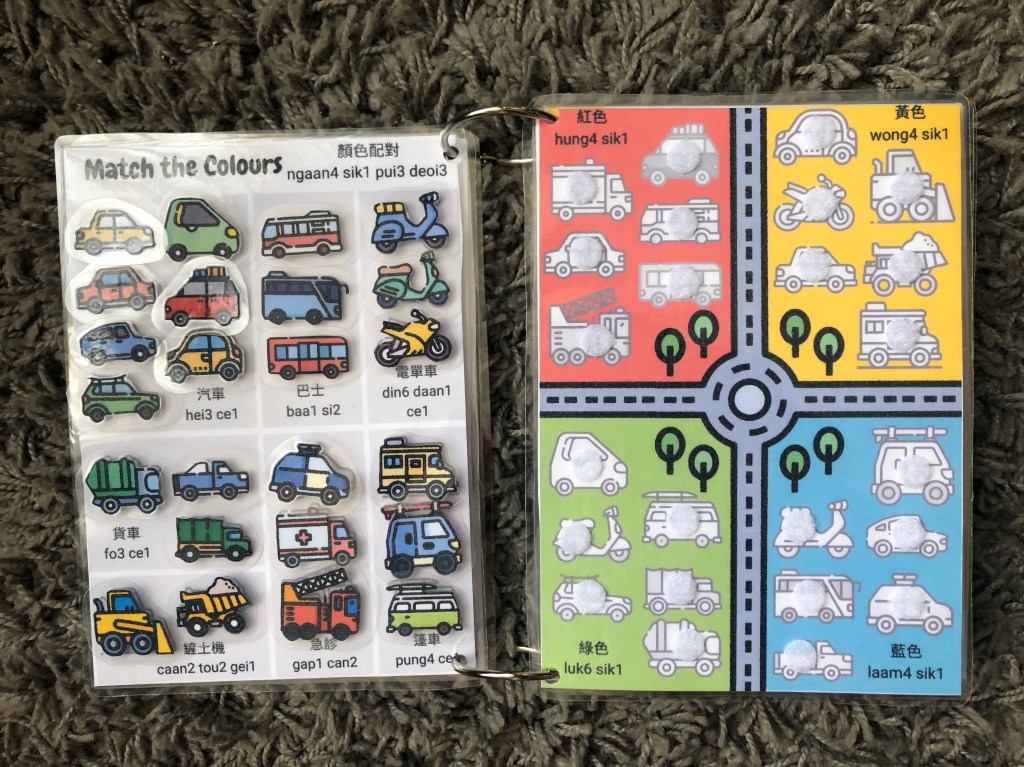
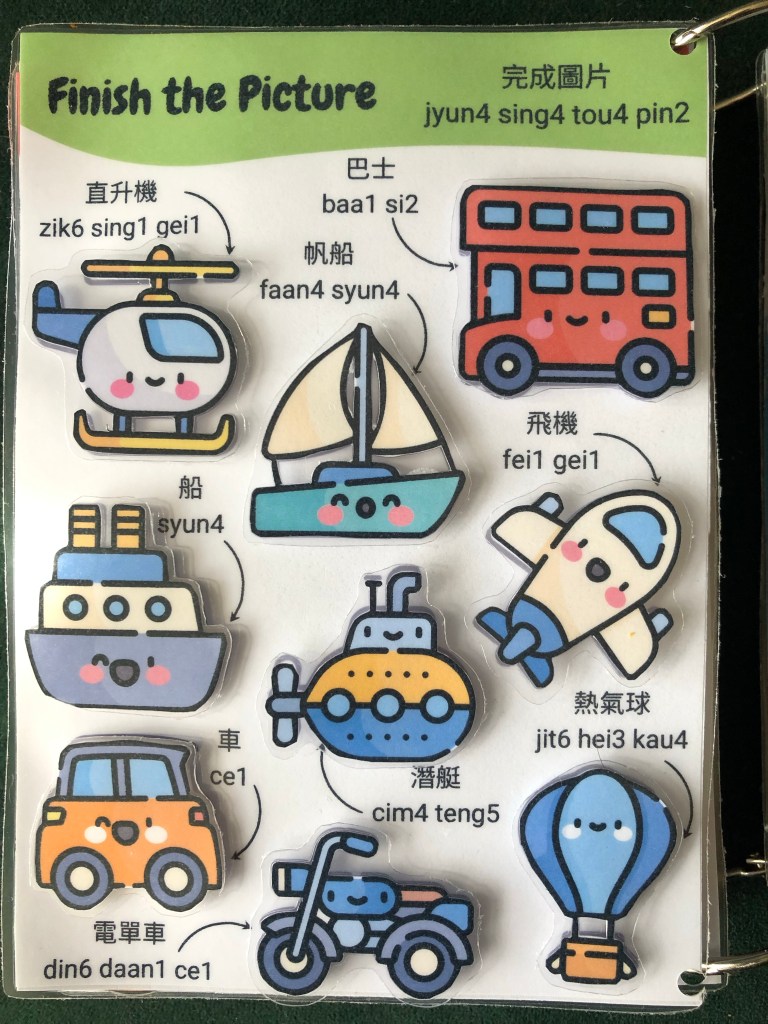
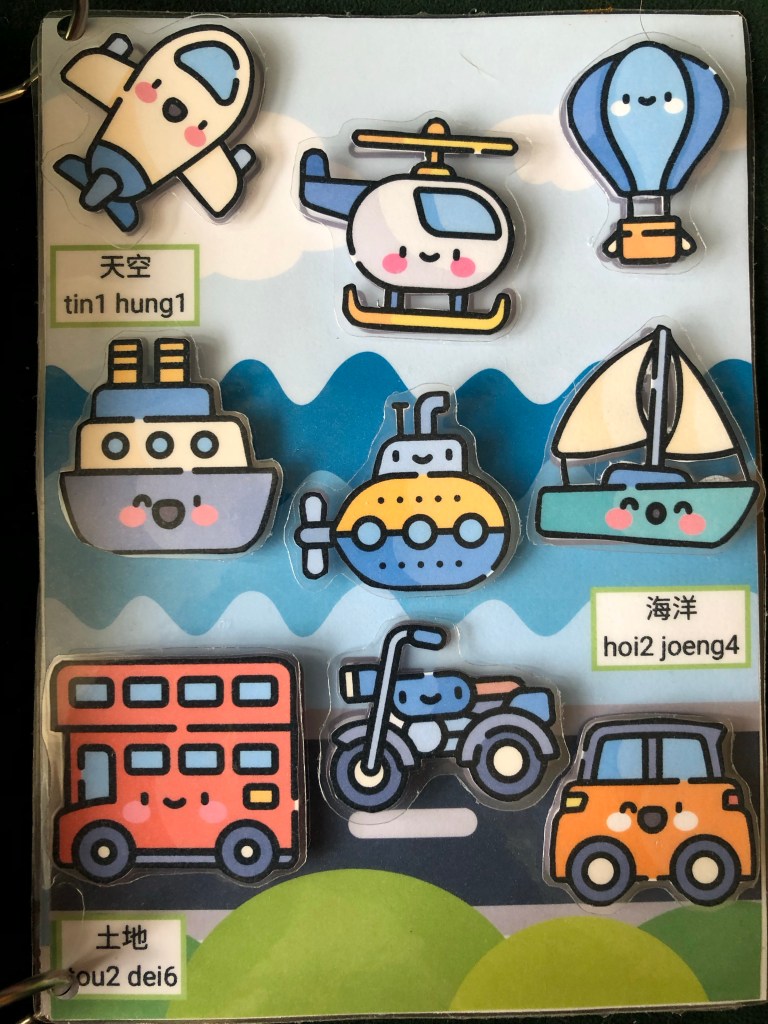
- Vehicles
Unlike some busy books, I built in reverse activities for when you want to reset activities and pieces. For example, once you’ve categorised the household objects by shape, the reverse activity is to place the objects next to their names in Cantonese. I’ve tried to maximise the amount of Cantonese exposure to be gained throughout the book.
How to Create your own Busy Book
You will need:
- A4 printer paper – at least 90gsm as the pages are ink heavy
- A4 laminator sheets – I used ones with a thickness of 250 microns to make the pages and pieces sturdy enough for a toddler to handle
- Self adhesive Velcro dots – I recommend getting small ones and using two dots on larger pieces but you can get larger dots, which you can trim for smaller pieces.
- 2 index card rings – get a large diameter (I used 1.8” ones) as your book will be very thick once all the pieces are Velcro’ed in
- Scissors
- Craft knife (optional)
- Hole puncher
- Printer
- Laminator
Stage 1: Prepare the book pages
- Print off the booklet pages with your printer set to fit two pages per sheet. Make sure you print single sided.
- Trim the booklet pages down using the crop marks as guides (pages have bleed areas designed for trimming).
- Laminate four pages at a time in each laminator sheet. In the first laminator sheet, you’ll have pages 1 and 2 back-to-back and pages 3 and 4 back-to-back and so on and so forth.
- Trim each of your laminated sheets in half to separate the pages.
- Order your pages and hole punch the top left and bottom left corners
- Attach the pages using two metal rings.
Stage 2: Prepare the pieces
- Print off the pieces – again two pages per sheet, single sided to ensure the pieces are the same size as they appear in the book pages.
- Cut out each piece then laminate. Make sure to leave plenty of room between pieces in case they shift during the lamination process. (I learnt this the hard day and had to redo pieces).
Stage 3: Build the book
- Stick the soft side of the Velcro dots on each book page. Most pieces were large enough to require two dots. Make sure you place the dots in the same place each time the appears.
- Attach the scratchy side of the Velcro dots to one side of each activity, sticky side up. Then, press the laminated pieces on top, to ensure the scratchy dots are stuck perfectly aligned.
- For the face (page 5), I didn’t stick down the soft sides first. Instead, I followed the above steps for the face parts page (page 4). Then choose a set of eyes, nose and mouth and attach the soft dots to them (via the velcro so sticky side out). After, place the face pieces on the blank face so the soft dots adhere to the face in suitable locations.
Further Notes
- You can see I cut out the pages and pieces before lamination then trimmed them again post lamination. This way, you get a cleaner finish with no white trim and there is a decreased risk of the laminating layers peeling off. However, if you want to save time, you can just laminate whole pages and cut everything after.
- For small pieces like the colour-matching vehicles and the face parts, cut a wide trim after laminating the pieces. As the trim will be clear, it won’t affect the look of the pages but will make it easier for your little one to grasp (and less likely for them to eat any pieces!)
- The downloads are designed to be printed on A4 paper but because the pages are made to be trimmed anyway, printing them on different sized paper shouldn’t cause too much of an issue. If printing on a different size, make sure to use the same scaling method on both the book pages and pieces so the sizes are consistent.
- Whilst busy books are intended for children as young as 18 months, the small parts means you should fully supervise your child during use if they are still at the stage of exploring everything with their mouths! Also, please bear in mind is always the small possibility that a Velcro dot can become detached.
Want a ready-made copy?
If you are located in the UK and want to save yourself to hassle of creating your own book, then DM me on Instagram or email me to purchase a read-made copy. I can personalise your book with your child’s name and favourite colour. Books cost £27 plus postage and payable through PayPal. Thank you for your support!
P.S. You can support Mama Bear Cantonese on Patreon. From £1 a month, you can access editable versions of all my resources, including this busy book, as well as bonus content. Your generosity will help cover this site’s running costs. 多謝 do1 ze6!

2 thoughts on “DIY Cantonese Busy Book”